| .. | ||
| plugin | ||
| src | ||
| CMakeLists.txt | ||
| gen_wts.py | ||
| README.md | ||
| samples | ||
| yolov5_cls_trt.py | ||
| yolov5_cls.cpp | ||
| yolov5_det_cuda_python.py | ||
| yolov5_det_trt.py | ||
| yolov5_det.cpp | ||
| yolov5_seg_trt.py | ||
| yolov5_seg.cpp | ||

YOLOv5
TensorRTx inference code base for ultralytics/yolov5.
Contributors


Different versions of yolov5
Currently, we support yolov5 v1.0, v2.0, v3.0, v3.1, v4.0, v5.0, v6.0, v6.2, v7.0
- For yolov5 v7.0, download .pt from yolov5 release v7.0,
git clone -b v7.0 https://github.com/ultralytics/yolov5.gitandgit clone -b yolov5-v7.0 https://github.com/wang-xinyu/tensorrtx.git, then follow how-to-run in tensorrtx/yolov5-v7.0 - For yolov5 v6.2, download .pt from yolov5 release v6.2,
git clone -b v6.2 https://github.com/ultralytics/yolov5.gitandgit clone -b yolov5-v6.2 https://github.com/wang-xinyu/tensorrtx.git, then follow how-to-run in tensorrtx/yolov5-v6.2 - For yolov5 v6.0, download .pt from yolov5 release v6.0,
git clone -b v6.0 https://github.com/ultralytics/yolov5.gitandgit clone -b yolov5-v6.0 https://github.com/wang-xinyu/tensorrtx.git, then follow how-to-run in tensorrtx/yolov5-v6.0. - For yolov5 v5.0, download .pt from yolov5 release v5.0,
git clone -b v5.0 https://github.com/ultralytics/yolov5.gitandgit clone -b yolov5-v5.0 https://github.com/wang-xinyu/tensorrtx.git, then follow how-to-run in tensorrtx/yolov5-v5.0. - For yolov5 v4.0, download .pt from yolov5 release v4.0,
git clone -b v4.0 https://github.com/ultralytics/yolov5.gitandgit clone -b yolov5-v4.0 https://github.com/wang-xinyu/tensorrtx.git, then follow how-to-run in tensorrtx/yolov5-v4.0. - For yolov5 v3.1, download .pt from yolov5 release v3.1,
git clone -b v3.1 https://github.com/ultralytics/yolov5.gitandgit clone -b yolov5-v3.1 https://github.com/wang-xinyu/tensorrtx.git, then follow how-to-run in tensorrtx/yolov5-v3.1. - For yolov5 v3.0, download .pt from yolov5 release v3.0,
git clone -b v3.0 https://github.com/ultralytics/yolov5.gitandgit clone -b yolov5-v3.0 https://github.com/wang-xinyu/tensorrtx.git, then follow how-to-run in tensorrtx/yolov5-v3.0. - For yolov5 v2.0, download .pt from yolov5 release v2.0,
git clone -b v2.0 https://github.com/ultralytics/yolov5.gitandgit clone -b yolov5-v2.0 https://github.com/wang-xinyu/tensorrtx.git, then follow how-to-run in tensorrtx/yolov5-v2.0. - For yolov5 v1.0, download .pt from yolov5 release v1.0,
git clone -b v1.0 https://github.com/ultralytics/yolov5.gitandgit clone -b yolov5-v1.0 https://github.com/wang-xinyu/tensorrtx.git, then follow how-to-run in tensorrtx/yolov5-v1.0.
Config
- Choose the model n/s/m/l/x/n6/s6/m6/l6/x6 from command line arguments.
- Input shape defined in yololayer.h
- Number of classes defined in yololayer.h, DO NOT FORGET TO ADAPT THIS, If using your own model
- INT8/FP16/FP32 can be selected by the macro in yolov5.cpp, INT8 need more steps, pls follow
How to Runfirst and then go theINT8 Quantizationbelow - GPU id can be selected by the macro in yolov5.cpp
- NMS thresh in yolov5.cpp
- BBox confidence thresh in yolov5.cpp
- Batch size in yolov5.cpp
Build and Run
Detection
- generate .wts from pytorch with .pt, or download .wts from model zoo
// clone code according to above #Different versions of yolov5
// download https://github.com/ultralytics/yolov5/releases/download/v7.0/yolov5s.pt
cp {tensorrtx}/yolov5/gen_wts.py {ultralytics}/yolov5
cd {ultralytics}/yolov5
python gen_wts.py -w yolov5s.pt -o yolov5s.wts
// a file 'yolov5s.wts' will be generated.
- build tensorrtx/yolov5 and run
cd {tensorrtx}/yolov5/
// update CLASS_NUM in yololayer.h if your model is trained on custom dataset
mkdir build
cd build
cp {ultralytics}/yolov5/yolov5s.wts {tensorrtx}/yolov5/build
cmake ..
make
sudo ./yolov5_det -s [.wts] [.engine] [n/s/m/l/x/n6/s6/m6/l6/x6 or c/c6 gd gw]  // serialize model to plan file
sudo ./yolov5_det -d [.engine] [image folder]  // deserialize and run inference, the images in [image folder] will be processed.
// For example yolov5s
sudo ./yolov5_det -s yolov5s.wts yolov5s.engine s
sudo ./yolov5_det -d yolov5s.engine ../samples
// For example Custom model with depth_multiple=0.17, width_multiple=0.25 in yolov5.yaml
sudo ./yolov5_det -s yolov5_custom.wts yolov5.engine c 0.17 0.25
sudo ./yolov5_det -d yolov5.engine ../samples
-
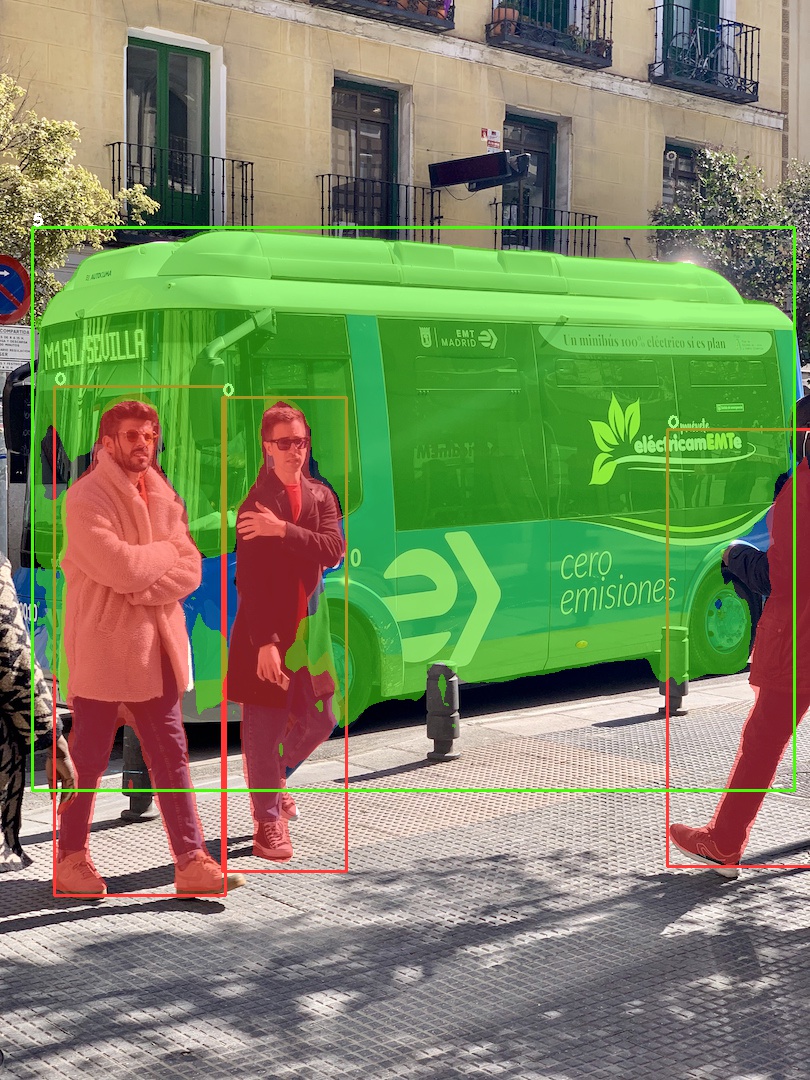
check the images generated, as follows. _zidane.jpg and _bus.jpg
-
optional, load and run the tensorrt model in python
// install python-tensorrt, pycuda, etc.
// ensure the yolov5s.engine and libmyplugins.so have been built
python yolov5_det_trt.py

// Another version of python script, which is using CUDA Python instead of pycuda.
python yolov5_det_trt_cuda_python.py

Classification
# Download ImageNet labels
wget https://github.com/joannzhang00/ImageNet-dataset-classes-labels/blob/main/imagenet_classes.txt

# Build and serialize TensorRT engine
./yolov5_cls -s yolov5s-cls.wts yolov5s-cls.engine s

# Run inference
./yolov5_cls -d yolov5s-cls.engine ../samples
Instance Segmentation
# Build and serialize TensorRT engine
./yolov5_seg -s yolov5s-seg.wts yolov5s-seg.engine s

# Run inference
./yolov5_seg -d yolov5s-seg.engine ../samples
INT8 Quantization
-
Prepare calibration images, you can randomly select 1000s images from your train set. For coco, you can also download my calibration images
coco_calibfrom GoogleDrive or BaiduPan pwd: a9wh -
unzip it in yolov5/build
-
set the macro
USE_INT8in yolov5.cpp and make -
serialize the model and test
More Information
See the readme in home page.